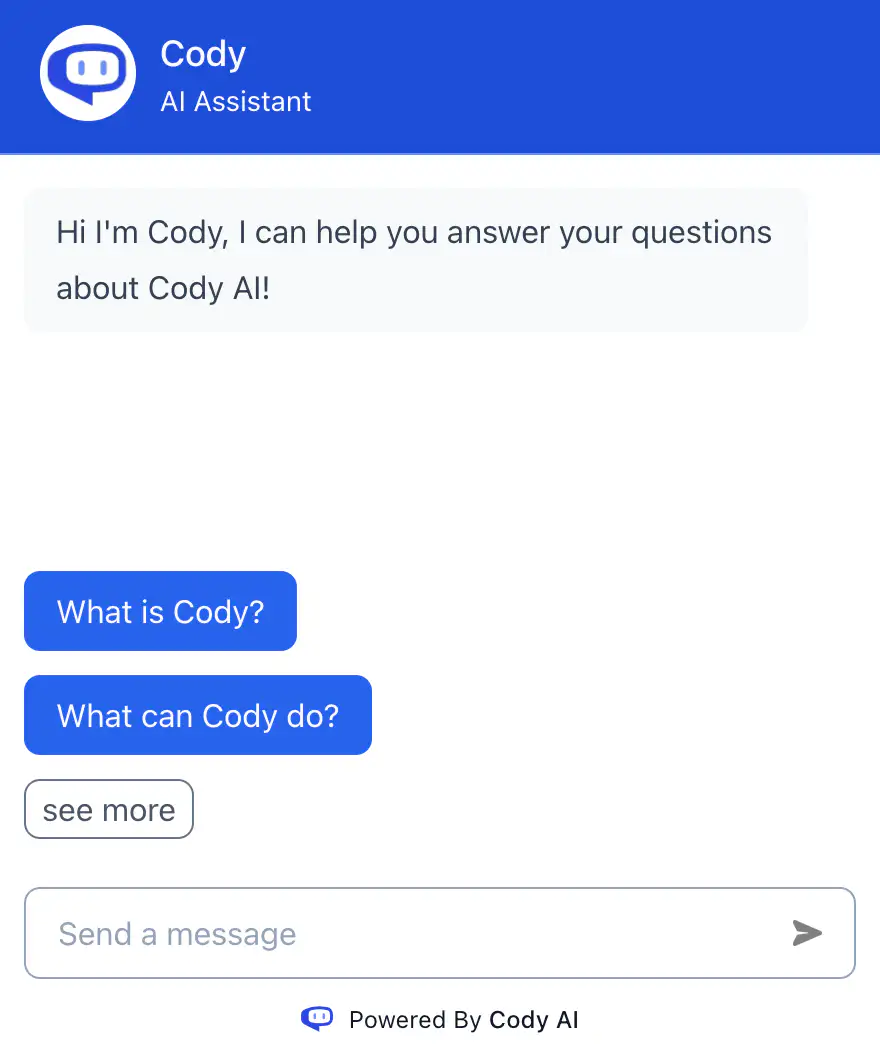
Look, mum—no code! In just a few clicks you can add an AI chatbot to your Trevally dashboard and train it on the documents in your own handbook. The result? A personal assistant that instantly tells you which chapter holds the latest ISO update or how to run that seldom-used procedure.
Disclaimer
- Gimmick, not blueprint. This is a fun proof of concept, not a preview of how ManualMaster will ultimately integrate AI.
- No support. We’re happy to help with our regular products; this DIY bot comes with zero helpdesk.
- Data & hallucinations. AI sometimes invents things. In a quality-management system that’s a no-go, so treat answers as suggestions, not gospel, and always check how your data are stored.
Why you might still want to try it
- Instant Q&A for your handbook – new colleagues find their way in seconds.
- Self-service support – fewer repeat questions for the QHSE team.
- A taste of the future – experience today what AI could do tomorrow, before our official integration goes live.
What you won’t get with it
- A watertight quality check (AI still supplements human work, it doesn’t replace it).
- Official ManualMaster support or guarantees.
Ready to experiment?
Right below this article you’ll find a step-by-step guide that lets you spin up a working bot in under an hour—complete with tips on choosing a supplier, safeguarding data and embedding the bot in Trevally.
In short: Yes, you can add a handbook chatbot to Trevally today. No, it isn’t production-ready. Feel free to explore, learn a lot, and switch it off again if needed. Have fun experimenting!
Read on for a complete step by step instruction written by our colleague Hugo Bakker.
Introduction
Step-by-step guide: adding a chatbot to your Trevally dashboard
Enriching Trevally with a chatbot requires no deep technical skills. If I can do it, anyone can—right?
What you need
- An AI/chatbot tool (more on that below)
- Administrator access to your Trevally system
My goal was to place a chatbot on our own MMWeb site that helps me use the Trevally application.
Preparation
Gather your information
First, decide where the bot will get the knowledge it needs. I chose the Trevally manual, which lives as a document inside our own Trevally handbook.
This is the perfect time to think about data security. Discuss thoroughly with your security officer and/or IT department before you upload anything to a chatbot tool.
Collect the PDF files
The chatbot I used can ingest PDF files. Here’s how I obtained PDF versions of the Trevally documents:
- Create a “Book” via Distribution → Books and tick Offline publication.
- Go to System → Task planner and run Offline publication by clicking Execute task.
- When the task is finished, return to Distribution → Books, select the correct book and click Download.
- You’ll find the exported PDFs in subfolders inside the
\Documentsdirectory. Move them into a single folder so you can upload them easily later.
The Chatbot
Choose a chatbot tool
I went with Cody. There are plenty of providers with similar features; choose the one that fits your security and budget requirements.
Set up the chatbot tool
On Cody – Business AI Employee Trained on Your Knowledge Base I signed up for a free account, then:
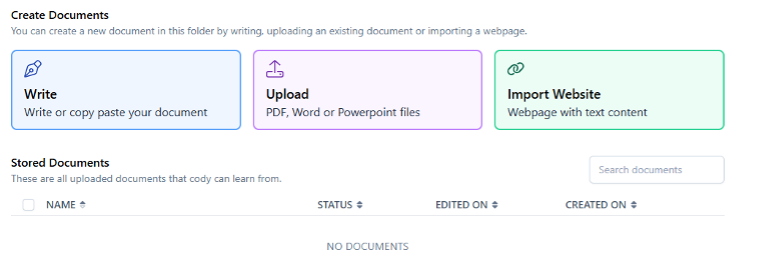
- Create a folder under Knowledge (I called mine Help Resources).
- Upload the PDFs in small batches (free accounts have limits).
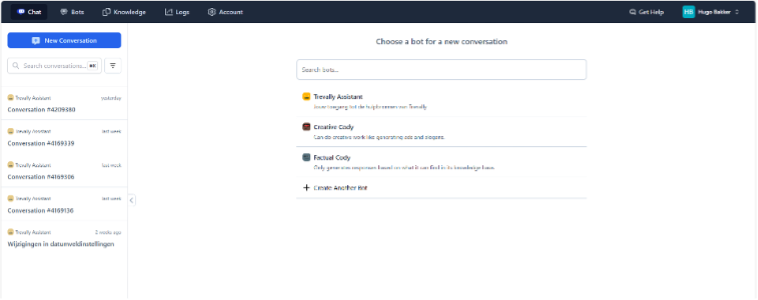
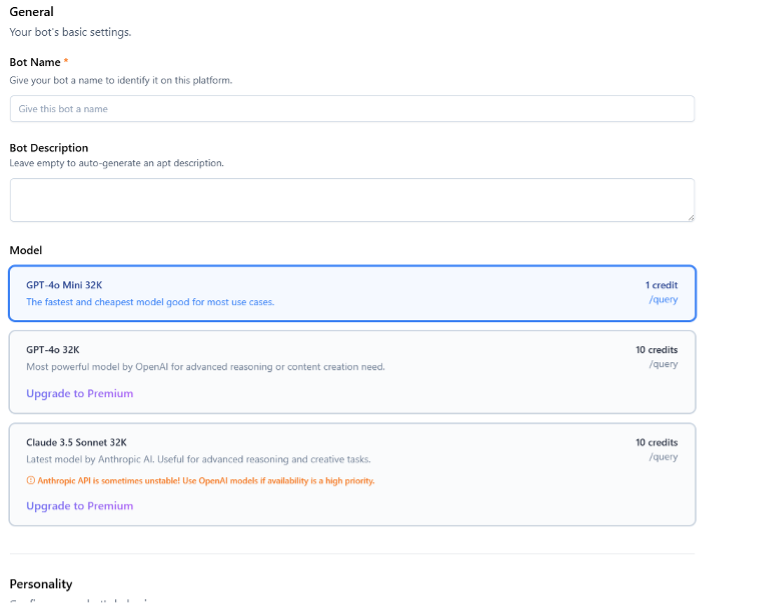
- Create a new bot under Bot, give it a name and choose its behaviour—for me, Factual on GPT-4o Mini 32K.
- Select the correct knowledge folder(s) so the bot knows where to look.
Maak de bot beschikbaar in Trevally
Make the bot available on the Trevally dashboard
Open the bot’s </> Share settings:
- Decide whether the bot is public.
- Specify the allowed domains.
Copy the embed code (I chose Inline Embed) and save it in a text editor for later.

Aanpassen van het dashboard in Trevally
6 · Add the bot to the Trevally dashboard
- Clone the dashboard: in MMWeb go to Dashboards, select the dashboard to edit and click Clone. Name it e.g. “Test with Bot”.
- Add a new tile: scroll down, click the three dots (Options), choose Custom tile, and set Source type to Javascript.
- Enter HTML: in the HTML field paste:
<HTML>
  <BODY>
  </BODY>
</HTML>
Insert the Cody embed snippet between
<BODY>and</BODY>and click Save. - (Optional) Style the tile: tweak appearance as you like; I set the background to white (
#FFFFFF). - Resize the tile for a pleasant user experience.
- Save & assign the dashboard: save it and assign it to yourself under Assign → OE → Person.
Done! Go to your MMWeb start page and admire your customised dashboard with its chatbot tile.
Afronding en tips
Finishing touches & tips
You’ll probably spend extra time fine-tuning the layout and experimenting with Cody’s settings. In this example I used the Trevally manual, but you can create multiple bots for different knowledge areas—HR, quality procedures, anything you like.
We’d love to hear about your results!